Monthly Archives: August 2011

  • Recessed Lighting Decorative Glass Trims

    Oh, bring on the bling! That's what I say...

    Looking for that "wow" factor in your recessed lighting design? It's really easy with the family of decorative glass trims (especially in the 4" low voltage section) offered at Total Recessed Lighting. Whether you are trying to achieve accent lighting, task lighting or general lighting in your space, you can accomplish all that while making your own distinctive design statement.

    I must confess to being a bit of a 'raven'-I am very partial to things that are bright and shiny. Which will help to explain my enthusiasm for the decorative glass trims. Not to mention that I am an artist, so these have a special place in my heart. They are art in themselves. These decorative (aka deco) glass trims are colorful, stylish, beautiful, sexy (yes, I said it, sexy), architectural and artful all rolled up into one. The hardest part would be in making a decision as there is a large offering of styles and colors to choose from.

    One of the key design elements for  lighting a room is to have different 'layers' of light. By layers, we are talking about task lighting, general lighting and accent lighting. The next time you walk into a well designed space, take a look at how the lighting is done. You'll see this in hotel lobbys, spas, high end model homes-notice how good everything looks. These layers of light add not only drama, but depth to your space.

    We put together a video for you in hopes that it will give you a better idea as to how they look. Mind you, it's just a small sampling of the trims that Total Recessed Lighting has to offer.  Do check out the video (if a picture is worth a thousand words-a video is worth a million words) and see what you think.

    If you need help or have question in regards to these trims and appropriate applications, feel free to contact us and our professional staff will be more than happy to help you with your design questions. We are one of the few companies out there that actually has an in-house lighting design expert.

    If you use these gorgeous glass trims in your project, send us your 'before' and 'after' pictures. We'd love to post them here on our blog.

    Posted in:

    Tags: 4" Recessed Lighting, Low Voltage, glass trims for recessed lighting, 4"recessed lighting glass trims, low voltage recessed lighting glass trims

  • Cutting a Hole in Your Plaster Ceiling for Recessed Lighting

    Note: this article is reprinted in its entirety with permission from the blog of the nice folks at Hole Pro. We get a lot of customers with questions in regards to cutting the holes for recessed lighting. Often, mistakes are made-some of which are very difficult to correct for. We think you will find their article very helpful-particularly if you have a plaster ceiling (be it new or old). Be sure to visit their web site for more of their product information. Although we don't have any holes to cut right now, we're trying to think of excuses to buy one of these (Hole Pro)! Thank you to Hole Pro for letting us reprint their article.


    There are many times when one or more holes need to be made in a plaster ceiling, whether for recessed light cans, audio speakers, a heating or air conditioning duct, or to add a ceiling fan. Plaster ceilings have been done in different ways in different parts of the country and at different times. After 1950 most plaster ceilings have a metal lath. In prior years the lath could be metal, chicken wire, or wood. In many cases the nails that originally held the pieces of lath in place have largely disappeared from corrosion over the years.

    We recommend treating the plaster ceiling hole cutting operation as a two stage process. First cut the plaster and remove the plug. Second cut the lath using the hole in the plaster as a guide. The Hole Pro adjustable hole cutters make a clean straight cutout hole in the plaster for the can light or ceiling speaker and with the straight edge the grill or trim rings will sit flush against the surface of the ceiling. With the circular scoring motion of the tungsten carbide cutting blades the two layers of the plaster are not likely to separate and cause a crack in the ceiling (which can be very expensive to repair).

    The best tool for cutting the lath depends upon the material used. For standard metal lath a carbide grit reciprocating saw blade works very well. For wood lath a fine tooth bi-metal reciprocating saw blade usually works the best. For chicken wire it is best to use diagonal cutting pliers (dikes) or snips to cut the wire lath.

    In theory it would be simpler to use a continuous edge tungsten carbide rim grit hole saw and cut through all three layers. There good reasons why this is often not the case. It comes down to cost. Each size of carbide grit hole saw costs between $45 and $80 depending upon the brand and the hole saw only works for one size hole. The sizes provided by all manufacturers (Milwaukee, Greenlee, MK Morse, Lenox) are limited to 3-3/8″, 4-3/8″, 5-3/8″, 6-3/8″, 6-5/8″, 6-7/8″. With more than 20 common recessed can light cutout sizes needed the sizes available are seldom going to work.

    Posted in:

    Tags: cutting a hole for recessed lighting, installation, Hole cutting

  • Installing Recessed Can Lights in Ceilings

    Note: this article is reprinted in its entirety with permission from the blog of the nice folks at Hole Pro. We get a lot of customers with questions in regards to cutting the holes for recessed lighting. Often, mistakes are made-some of which are very difficult to correct for. We think you will find their article very helpful. Be sure to visit their web site for more of their product information. Although we don't have any holes to cut right now, we're trying to think of excuses to buy one of these (Hole Pro)! Thank you to Hole Pro for letting us reprint their article.


    Installing recessed can lights or high hats in ceilings has gotten more complicated with all the new sizes of LED, PAR, and CFL light fixtures. Instead of three common hole cutout sizes for the majority of recessed can lights (6-3/8, 6-5/8, 6-7/8 inches, there are now more than 27 common sizes and very few in these traditional diameters.

    For example the Halo brand of recessed light cans sold by Amazon, Lowe’s, Home Depot, and others, have manufacturer recommended cutout hole sizes of 3-3/4″, 4-1/4″, 5-1/2″, 6-1/4″, 6-7/16″ for the different size can lights. Another common recessed can light manufacturer is Juno and for their can lights one needs cutout holes of 3-1/4″, 4-3/8″, 5-1/2″ 6-3/4″, 6-7/8″. And this is just for the residential high hats or recessed ceiling lights. Commercial can lights can require cutout holes larger than 8 inches in diameter. So one can spend hundreds of dollars on continuous rim grit hole saws and still not have the right hole saw sizes for the most common can lights. Or for $129 a Hole Pro model X-230 hole cutter can cut any size cutout hole needed from 1-7/8 to 9 inches in diameter.

    There are a number of important advantages to using a Hole Pro adjustable hole cutter to make the cutout holes for recessed can lights (or downlights). First is the ability to make the exact size hole needed in whatever ceiling material is to be cut. For thick plaster a slightly larger cutout hole may be needed to provide room for pushing up a remodel style can light into the ceiling space. With soft sheetrock a close fit may be needed with smaller LED can lights like the 3 inch and 4 inch models from Utilitech sold by Lowe’s and the Con-Tech fixtures sold by Home Depot.

    Most of the manufactures have stopped publishing the cutout dimensions so one does not the exact hole size needed until the light cans have been purchased and one can measure the template in the box. Often the template is the same for all models from the manufacturer and may be too small for some of the variations, especially with the remodel light cans. With the remodel or retrofit type of recessed ceiling can light the entire fixture has to slip through the opening and often the size of the opening is dictated by the arm that attaches the fixture to the electrical junction box. Some designs, like the Halo in particular, make it much more difficult to insert the can light assembly.

    The Halo H5RICAT (“5″ indicates 5″ fixture, “R” indicates remodel/retrofit type and the “I” indicates that it is OK for direct contact with insulation) comes with a template for a 5-1/2 inch size cutout hole. In an actual installation the tape that is wrapped around the light can to help make a good air seal increases the outer diameter of the light can so it requires a 5-5/8″ cutout at a bare minimum and 5-11/16 inches is a safer size to minimize damage  to the sheetrock.

    The “air tight” ceiling fixtures when installed properly can significantly reduce loss of heated air from living spaces up into the attic. All the air tight fixtures I have examined from the major suppliers are cheaply modified with a thin strip of insulating tape that probably adds 2 cents to the manufacturing cost and does a poor job of providing an air seal. A foam sealant would do a much better job.

    The H750RICAT is supposed to fit through a 6-1/4″ cutout hole cut but actually the can light needs a hole at least 6-3/8 inches in diameter for the can portion of the fixture.

    The Halo H750RICAT recessed remodel light can is most easily installed through a 6-1/2 inch opening so that the junction box and can cylinder and the thick arm bracket (outlined in red in the picture) all fit through the opening in the ceiling.

    Some of the less expensive remodel type can lights have a thin metal arm that is 1/8″ thick strap steel and which makes them much easier to insert in the ceiling opening. This thin bracket is shown in the picture outlined in red.

    When making the cutout holes for recessed can lights the Hole Pro adjustable hole cutter makes it faster and a lot safer with its adjustable cutting depth control The cutting depth can be set so that the blades only cut the sheetrock or plaster or tongue and groove wood ceiling and nothing more. No worries about accidentally cutting an electrical wire, low voltage audio wire, or plumbing pipe in the ceiling space and turning a small project into an expensive repair job.

    The Hole Pro hole cutters also save a lot of time when installing downlights. The hole can be cut faster than a cutout circle can be drawn on the ceiling with the template. It is easy to cut a perfect round hole even with only one hand to hold the drill with the hole cutter when high up on a ladder. The ABS plastic shield is ball bearing mounted so only the hole cutter spins and all the dust and shavings and the cut plug all stay in the shield. Invert the shield over a bucket and everything falls out and the hole cutter is ready for the next hole.

    A lot of time is saved when one only needs to place the hole cutter’s pilot drill bit in the center of the spot for the cutout and start to drill. No need to move furniture or lay out a tarp or get out the shop vacuum.

    Posted in:

    Tags: hole cutting for recessed lights, installation, Hole cutting

  • Going ‘green’ with your recessed lighting fixtures

    Many buildings (residential, retail and commercial) have 6” recessed lighting fixtures in their hallways, restrooms, board rooms, lobbies, stairwells, etc., where down lighting fixtures were needed and installed.

    With the cost of electricity going up almost every 6 months, energy efficiency becomes a higher priority on everyone’s minds. We decided to weigh in with some comments sent to us in regards to other light bulb options that can be used in recessed lighting that is more energy efficient, while keeping the cost down. The larger the building, the more this consideration is important to the bottom line.

    A few months ago at Total Lighting Supply, we were sent a new fluorescent screw in retrofit, called the “Top Spiral” R40 CFL (which is also available as a “Top Spiral” R30 CFL). A retrofit refers to the addition of new technology or features to older systems. Note that the “Top Spiral” R40 CFL (or R30) fluorescent spiral should not be confused or seen as the same as the other fluorescent R40s and R30s that are available.The retrofit light bulb that we were sent for the 6” recessed light is a compact fluorescent (CFL). We were pleasantly surprised to find that it  actually outperforms the rest of the other recessed lights by far.

    Here’s what we did: we replaced our old 65 watt incandescent flood with this new “Top Spiral” R40 CFL. Since the fixture already had an incandescent R40, all we had to do was to swap out the light bulbs. If you were to swap out a incandescent R40 with a “Top Spiral” R30 CFL or vice verse (incandescent R30 with a “Top Spiral” R40 CFL), keep in mind that in doing so, you will also need to use a different trim to accommodate the diameter of the bulb.

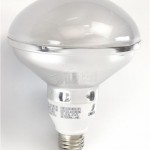
    The new bulb, shown here, costs less than $10 and will out last the incandescent energy pig significantly longer.  Is it worth your time and energy to swap out? We spent $4.95 on the incandescent R40 bulb. The “Top Spiral” R40  CFL costs $9.50. So, you’re thinking, where’s the savings in that? You realize a savings with the “Top Spiral” R40 CFL by way of how much longer it will last: 8,000 hours versus 2,000 hours for the incandescent. That means the “Top Spiral” R40 CFL lasts 4 times longer than the incandescent R40. Right off the bat, there is a $4.55 savings. And, in large building applications, that will help to keep your maintenance costs down.

    You will also realize a huge savings in energy consumption. The incandescent R40 is 65 watts versus the 30 watts for the “Top Spiral” R40 CFL. Remember, wattage is not the brightness of the bulb, but a measurement of how much energy it consumes. Another energy savings aspect is the heat output of the bulb: the incandescent puts out a lot of heat. So much, in fact, that we know of a gallery in Aspen CO, that runs their air conditioning in the winter to offset the heat output of their incandescent R40’s!

    Is one bulb brighter than the other? Brightness of a bulb is measured in two ways: candlepower and lumens. Our government mandates to the industry that brightness of a bulb be expressed in lumens. The “Top Spiral” R40 CFL is almost 3 times as bright as the incandescent R40: 1640 lumens versus 580 lumens, respectively.

    If all of this wasn’t enough to impress you, here’s one more aspect: this new fluorescent also has a better light spread and better aesthetic qualities than the incandescent counterpart. If you are lighting a hallway, a kitchen or a front desk at a hotel, it will provide a good, even, soft light, without the harsh shadows that the incandescent has. The light output of the “Top Spiral” R40 CFL (or R30) is a better task light to work under because of the even light spread. Incandescent R40’s typically make a hallway look like a mining shaft due to a narrower beam spread.

    You can see why we are excited about this new fluorescent “Top Spiral” R40 CFL reflector bulb; we give it a 5 star rating. If you are interested in saving money and energy, you will want to swap out your incandescent R40s (or R30s) for these “Top Spiral” R40 CFLs (or R30s). These bulbs are also offered at bulk price rates.

    Coming up in the next article: comparing LED light sources to fluorescent. Which one is better and more affordable? What applications are best for either light source?

    Retrofit CFL

    Buy the Top CFL Reflector bulb today!

    Posted in:

    Tags: CFL, Green, Fluorescent, Energy Saving

5 Item(s)